Welcome to my very first post on all the fun things we are going to do with the Raspberry Pi!
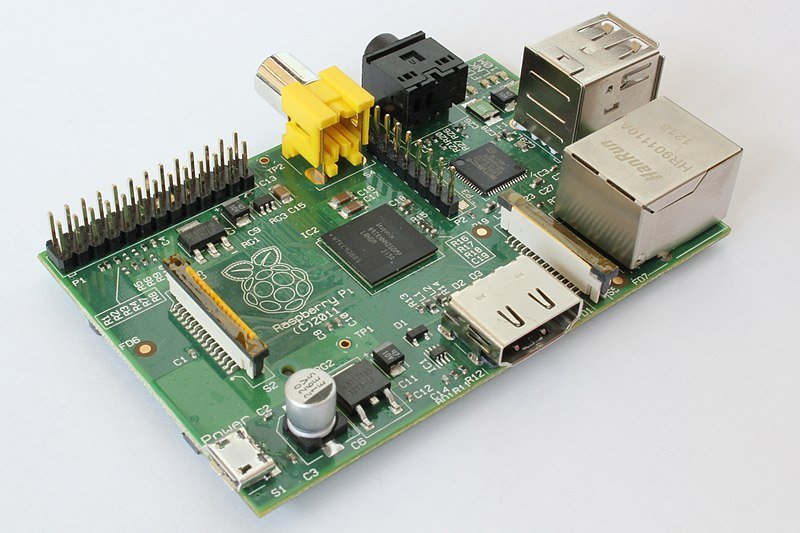
If you don’t know what a Raspberry Pi is, it’s basically a very small computer, about the size of a credit card that you can have on all the time as it consumes very little power. From hosting a website, to automating your home, the Pi can do a lot; obviously you won’t be able to do video editing or anything too heavy duty, but for something basic it is perfect.
I am often ask what can a Raspberry Pi do, and my answer is what can a computer do? There is so much things you can do on this little computer.
Personally, my Raspberry Pi is running my home automation, a torrent downloader, a VPN, a WordPress website, a network-wide ad blocker, and more!
Unfortunately you cannot run normal Windows, so for those who aren’t Linux users this might be a bit foreign but it’s OK as I’m also a newb to Linux, we can learn together! Plus all these tutorials will be accessible to screen readers.
Before we start I would like to say a huge thanks to Michael as he helped and explained a lot of the commands and Linux terminology to me.
The commands that you have to type in will be in text boxes on this page with a Copy link, so it will make it easier for you to copy and paste, but I encourage you to get used to typing it yourself.
As this is the first Raspberry Pi post, I just want to share the things you need and how to set it up, so make sure you continue to read this introductory post before attempting my Raspberry Pi projects!
Buying a Raspberry Pi
Due to the hardware, which is hardly anything, the price is extremely affordable, only £35 for the Raspberry Pi itself. You can go cheaper by getting the Raspberry Pi 0, but I recommend getting the Raspberry Pi 4 Model.
I got mine from RS Components in the UK, you may get it from a local provider, just take a look here to see the nearest retailers.
This is excluding other peripherals such as power cable, memory cards, etc which can bring the price up to about £50. However, the components that makes the Pi run is your everyday tech products so you might have some at home already and the Pi is the only thing you need. The two main things needed is a microSD memory card (at least 8gb) and a Micro USB cable.
Optional peripherals include:
- A Raspberry Pi case (to keep the Pi safe)
- An external hard drive or memory stick (to give the Pi more storage memory)
- A microSD card reader (to copy the software onto the card)
- Ethernet cable (the Pi does have Wi-Fi but I prefer to use wired)
- HDMI cable (if you wish to connect it to a TV/monitor)
- A Keyboard and mouse
The HDMI cable and keyboard & mouse is not needed for most of my tutorials as I will be interfacing with the Pi in a headless mode, this means that the Pi will be on and connected to my router and I will remote access into it from another computer using something called SSH which is a command line interface. Sounds confusing? It’s not that bad, I will [provide those commands!!
How to setup the Raspberry PI
Now that all your bits and bobs including the Pi has arrived, it is time to set it all up!
The Raspberry Pi can run different software, but the most popular operating system is Raspbian, you can download it here, I recommend using the light version as it’s a lot cleaner.
Once downloaded, unzip it.
You should see a single file in the folder with an .IMG extension this is the image that you will be flashing to your SD card.
Next download Win32DiskImager this will be the program that will put the Raspbian image onto the memory card.
Pop your microSD card in your card reader and open Win32DiskImager.
Tab once, it should be an unlabeled box, hit space, and an you can browse to that .IMG file we unzipped earlier.
As soon as you select the .IMG file it will take you back to the main program, tab once to Device. If you have multiple drives, you need to select the drive with the card.
Tab to Write and hit enter, a warning will prompt you to ask if you’re sure if you wish to write as existing files on the card will be deleted; hit yes, and wait for the card to be flashed!
This normally takes about 3 minutes, after you would hear a little tone to tell you it’s completed.
Close Win32DiskImager.
Before you take the card out there is one more thing, as of the end of 2016, SSH is disabled by default for security reasons. This is the feature that allows us to remote control our Pi; To enable it is very easy, you just need to create a file named ‘ssh’ and copy it into the main folder of the drive that you just flashed, it should be called boot. This will enable SSH. I simply created a text document and copied it into the boot folder. (it must be called ssh and not ssh.txt, read this article if you don’t know how to show and rename file extensions)
Or you can download the ssh file that I made here.
Once that ssh file is in your boot folder you may safely remove the card. Oh don’t worry about removing the file, it will be automatically deleted when SSH is enabled.
Next we will put everything together, insert the card, plug in the power cable and wait for it to turn on!
How do I SSH?
As there is no monitor there is no way to tell if the Pi was successfully started visually. This is where we will start SSH, for later versions of Windows 10 you can SSH using Window’s Command Line Interface.
Before you SSH however, you would need to get the IP address of your Raspberry Pi, you can get this by logging into your router and viewing all connected devices. Look for the name called Raspbian or Raspberry Pi Foundation. It’s out of the scope of this tutorial as every router is different, if you are unsure you would need to contact your internet service provider or do some Googling. The IP address of the Pi is normally something like 192.168.1.123. make a note of this number as you will need it every time you connect to your Pi. You can also try using raspberrypi.local instead of the IP address which will be a lot easier.
Press the Windows key alongside the R key to open a run box
Type in cmd and hit enter
if you rather paste in the commands over typing it out, CTRL+V doesn’t work in CMD, so you would have to press ALT+SPACE, go down to Edit, and Paste.
A box will show up, type the following:::
Copy
Or
Copy
replace the XXX with the end of your Raspberry Pi’s IP address)
If you are connecting for the first time it might give you a warning about authenticity, type yes and hit enter.
It will then ask for a password, type in raspberry
If it says something like, ‘ssh is not recognized as an internal or external command,
operable program or batch file’ then you would have to use PuTTY.
Open PuTTY, a box will show up, in the first field type in the IP address of your Pi and hit open.
A warning will show up as this is your first time, just hit yes.
It will then say log in as, the username here is pi and the password is raspberry, hit enter.
Congratulations! You are now connected to your Raspberry Pi!
Just a few considerations when using PuTTY:
Like CMD you cannot paste normally into the box with CTRL+V, you would have to right click on the window to paste, if you’re using NVDA, you can use the mouse clicking keys to do this:
First, make sure your mouse is focused on the PuTTY window by pressing SHIFT+NVDA+M, then to right click, press NVDA+]; that should paste in the text.
to read the consul and output of PuTTY use Object Navigation, Often NVDA+numpad 4 and NVDA+numpad 6 (NVDA+shift+left and right arrow if you are in laptop layout).
Preparing the Raspberry Pi
Before you move on to my other tutorials, let’s do some house cleaning
Change the password
raspberry is the default password so keeping it as such will be silly, you can change this by typing the following:
CopyEnter the current password (raspberry)
Enter your new password, confirm this and hit enter.
Expand your file system
To use all available space on your card you must expand file systems, you can do this by typing
CopyThis will open a menu that you can navigate by using your arrow keys, go down to Advance and hit enter. The first option Expand Filesystem is what we want, hit enter on it. It will tell you that it will be expanded on the next reboot, hit enter again.
You should be back to the main Raspi-config menu, tab once and go down, it should take you to Finish, hit enter.
It will ask you to reboot the Pi, hit yes and enter, and you will be disconnected.
Give it 2 minutes and reopen PuTTY/cmd again and reconnect using your ip address, username and your new password.
Update
To insure you are running the latest packages type the following two lines:
Copy CopyThis will download any updates, when prompted if you would want to continue, hit y for yes and enter. in future, you do not want it to ask for confirmation add a -y to the end of your command.
This might take a little longer as its your first time.
That’s all, your Raspberry Pi is now ready for you to tinker with!
If you need any help, please post your questions in the comments below, I’m happy to answer them.
If you are not sure what to do with your Pi, check out my other Raspberry Pi tutorials!
Raspberry Pi Tutorials
I’m writing these tutorials now and once posted, will be linked below, so make sure you are following me on socials.
- Access your Raspberry Pi Files on Windows Explorer
- How to Add More Storage to your Raspberry Pi
- Point a Domain Name to your Pi
- How to Setup a Personal VPN
- How to Put a Network Ad blocker on your Network
- How to Download Torrents
- How to Host a Website on your Raspberry Pi